
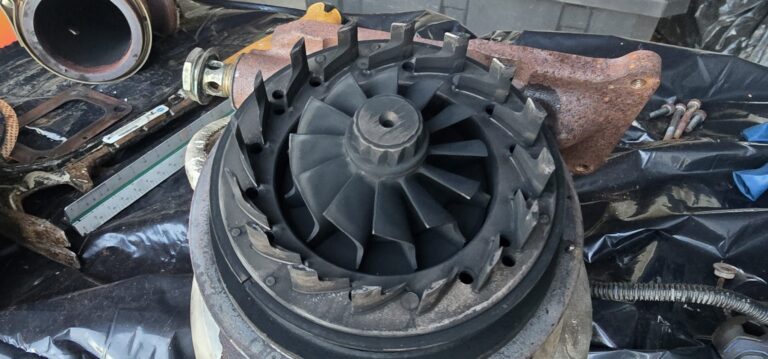
The CA18DET motor comes from the factory running 7psi of boost and sporting a small, inefficient side-mounted intercooler that becomes relatively useless at boost pressures above 10psi. Since project CA18DET will see two iterations, one sporting a t25 at 12psi and then a ball-bearing t28 at 14psi, the side-mount has to go.
Most will choose to upgrade to a front mount intercooler (FMIC) when ditching the side mount. This is exactly what I did at first and like many CA18DET owners, I chose to purchase one of the complete kits off of Ebay. This proved to be a mistake. The kit came with a large intercooler core with oversized hot and cold pipes and once installed, it became apparent that this intercooler and its plumbing were a huge mismatch for the 1.8 liter motor. Basically, this large intercooler and its associated piping meant that my turbo would have to work harder to pressurize the system. This resulted in increased lag and a t25 that takes 4000rpm to spool is not fun. The lesson, don’t buy the over-sized CA18DET intercooler kits off Ebay. If you want a FMIC, buy an intercooler for a civic and then fab the intercooler piping with 2 – 2.5in piping and call it a day.
After dealing with this dilemma, I really got to thinking about increasing efficiency and decreasing lag. Inspired by the V-mount systems many professional drifters run, I began to design a custom intercooling solution that would use 2 and a 1/4 inch diameter piping and keep the piping distance from the compressor to the manifold an absolute minimum. But instead of fabbing a V-mount system, I decided to try something different, liquid intercooling.
What is liquid intercooling?
Just like the name states, a liquid intercooler uses liquid (i.e. water) to cool the intake charge of a turbo charged vehicle. It uses a specialized intercooler that has a water jacket around it. Combined with a water pump and water reservoir, a liquid intercooler flows water around an intercooler core. Water can exchange much more heat than air and as a result, a properly designed liquid intercooled setup will yield colder intake charges than a traditional air-to-air intercooler. Colder intake temps = more horsepower.
Designing a liquid intercooler for the street.
Liquid intercoolers have been a staple of drag racing for ages. Drag racers typically use liquid intercoolers to achieve intake temperatures below ambient. In drag racing, the water reservoir can be filled with ice which will super cool the water flowing through the system. As a result, intercooler efficiencies near 100% are achieved. Unfortunately, street driven vehicles cannot rely on ice to cool the intercooler and as such a front heat exchanger needs to be incorporated. A front heat exchanger is basically a second radiator that exchanges heat from the liquid to the air. The main advantage of a liquid cooled, heat exchanged intercooler over a regular air-to-air system is that the liquid system is able to shed heat during idle, whereas a traditional air-to-air system cannot. All said, the liquid system will reach optimum efficiency in more circumstances than the air system.
Installing the liquid intercooler
Installing a liquid intercooler into a CA18DET equipped 240sx meant that I would have to source parts from various locations and piece together a functional system. I sourced a 1 gallon fuel cell from Summit Racing, an electric water pump from a liquid cooled Ford lightning, a heat exchanger from Seatrab made for a Volvo and a barrel style liquid intercooler by PWR. I then used 3/4 heater hose for the water lines. The final setup works in this manner:
- The water reservior is filled with water and flows to the top of the heat exchanger
- Water flows through the exchanger and is cooled by air. (just like a radiator)
- Water exits the heat exchanger at the outlet and flows to the electric water pump
- The electric water pump is placed at the lowest point in the system so as to always remain primed
- The water pump pumps freshly cooled water into the intercooler’s inlet
- Water in the intercooler absorbs heat and then exits the intercooler through its outlet
- The water is then returned to the reservoir to begin its journey over

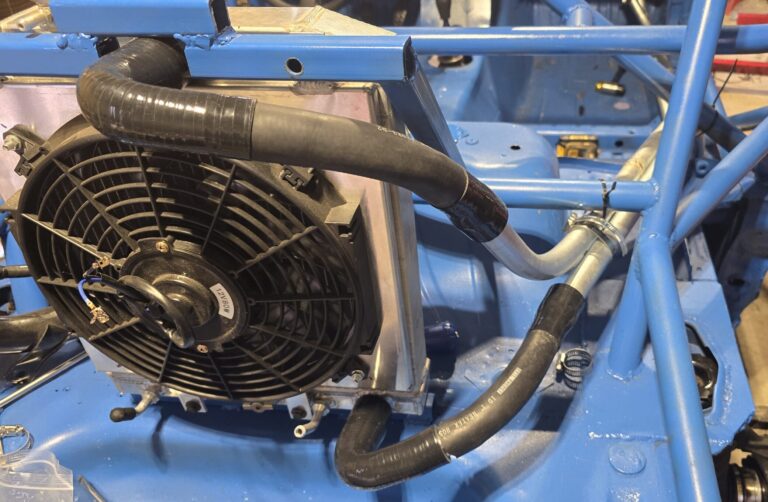
Barrel style intercooler installed on a CA18DET equipped 240sx. The barrel intercooler allows the intake piping to take an almost direct route to the throttle body, greatly aiding boost response. (fullsize)
Advantages of the liquid intercooler
Aside from the disadvantage of increased complexity, the liquid intercooler has turned out to be of huge benefit on the 1.8 liter CA18DET. Since the liquid intercooler does not need direct airflow, I was able to cut the charge pipe from the 12+ feet that a traditional FMIC requires down to a little over 4 feet. This direct path that the piping can now take greatly improves boost response. The motor simply comes alive with even the slightest blip of the throttle. Another benefit is that I can keep my battery located in the stock location. No more heavy gauge power cables running through the passenger compartment. Furthermore, with the front heat exchanger installed in front of the radiator, I can enjoy cooling efficiencies equal too or great than a FMIC and still have the option of adding ice to the water to achieve below ambient cooling. This will come in very handy if I decide to take a break from drifitng and make a guest appearance at the local drag strip. Finally, without a large front mount in its grill, project CA18DET fits the perfect sleeper profile, only betraying its boosted nature when asked.
Liquid Intercooling Update:
Hey guys, I have noticed a huge jump in traffic to this page and a lot of people are commenting that liquid intercooling is too complicated. I will be updating this page with the final installation of this system soon. This article was written when the liquid intercooler was roughed in and I have tweaked it in several aspects to clean it up and ultimately improve efficiency. Also, I have been asked by several people how much this system costs so here it goes:
- 4×6 PWR barrel style liquid intercooler – $350.00
- Misc hoses, couplers and adapters – $30.00
- Seatrab front heat exchanger made for a Volvo – $99.00
- 1 gal fuel cell for water reservoir – $75.00
- F-150 Lightning external electric water pump – $69.00
Coming to a total of $623.00 Also note that some items were bought on Ebay so prices may vary.
